


✨ Ultimate Enigma2 Receiver Guide
Many users repeatedly have problems with Enigma2 receivers and IPTV – but it doesn't have to be that way. ✨
Here is your ultimate guide to get SeroTV running on Enigma2 for everyone. Please read everything completely!
⚙️ 1. Preparation
1.1 What do you need?
- Windows notebook/PC
- Enigma2 receiver (4K & h.265, from 2017; OpenATV)
- Internal HDD or USB stick for EPG
- E-Channelizer (Live TV import)
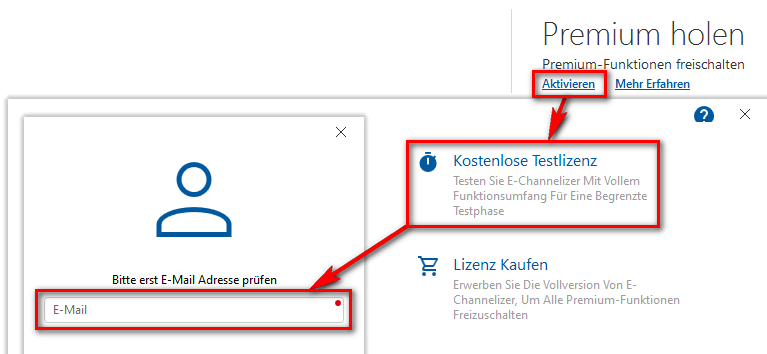
1.2 E-Channelizer Installation & Trial
- Go to the E-Channelizer website → Free Download.
- During installation, select “Check for BETA updates”.
- After first launch, click on Activate in the top right → request 2-week trial license.
1.3 Enigma2 Preparations
The following steps are on a fresh OpenATV installation:
- 1.3.1 Set root password
- 1.3.2 Adjust EPG settings
- 1.3.3 Download extensions
- 1.3.4 Optional: Hotkey & static IP
1.3.1 Set root password
Go to Settings → System → Network → Set password to set a new root password.
1.3.2 Adjust EPG settings
Change EPG storage location from internal to /media/hdd (protects flash memory).
1.3.3 Download extensions
Green button → Extensions → Install EPG-Importer & Xstreamity.
1.3.4 Optional: Set hotkey & static IP
- Hotkey: Settings → User Interface → Hotkey assign for EPG-Importer.
- Static IP: Settings → System → Network → Adapter Settings → Obtain address automatically: No.
✨ 2. E-Channelizer
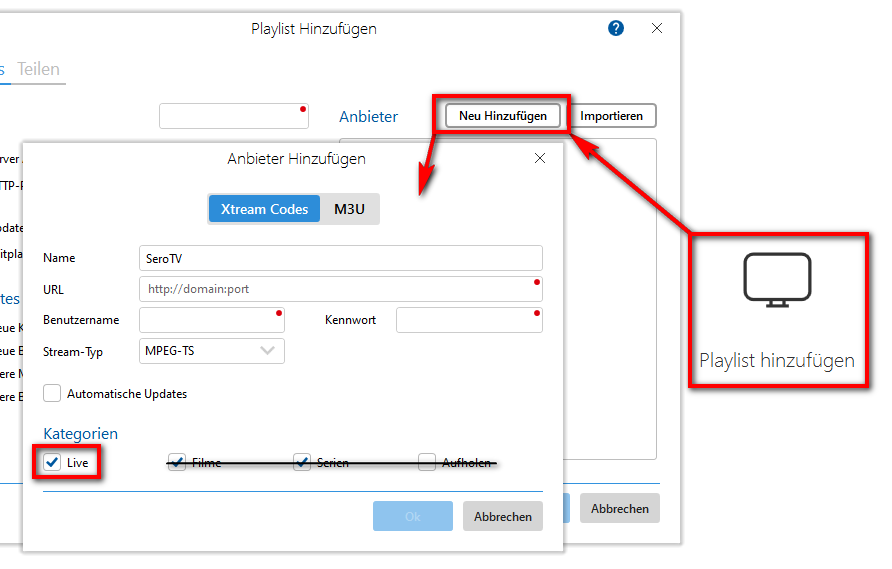
2.1 Add SeroTV Account
- Playlist → Add new → Enter data (activate only “Live”; deactivate movies/series/catch-up).
- Assign a name in the top left (mandatory!).
- Let channel logos load briefly, then cancel.
- Disable unneeded group bouquets via right click → Blacklist.
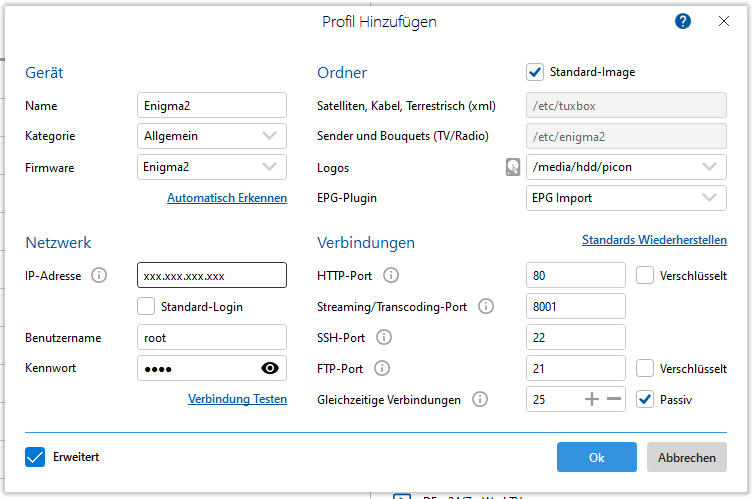
2.2 Transfer Playlist & Settings
- Devices → Add new → “Advanced” → Name, IP, root password, logos →
/media/hdd/picon. - Devices → Send → DVB query → No → Transfer settings.
ℹ️ 3. EPG-Importer
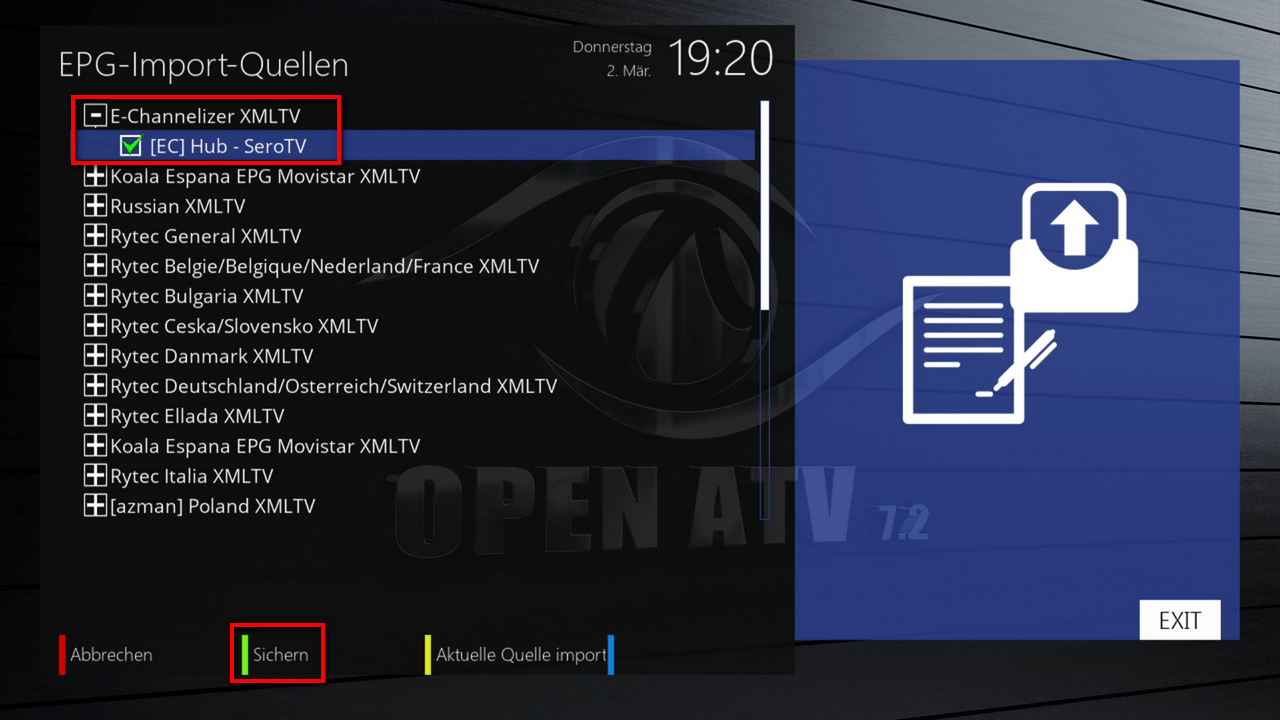
3.1 Configure & Load EPG
- Open EPG-Importer (hotkey or menu).
- Select days, activate sources → save.
- Press the yellow button → import starts (max. 2 min.).
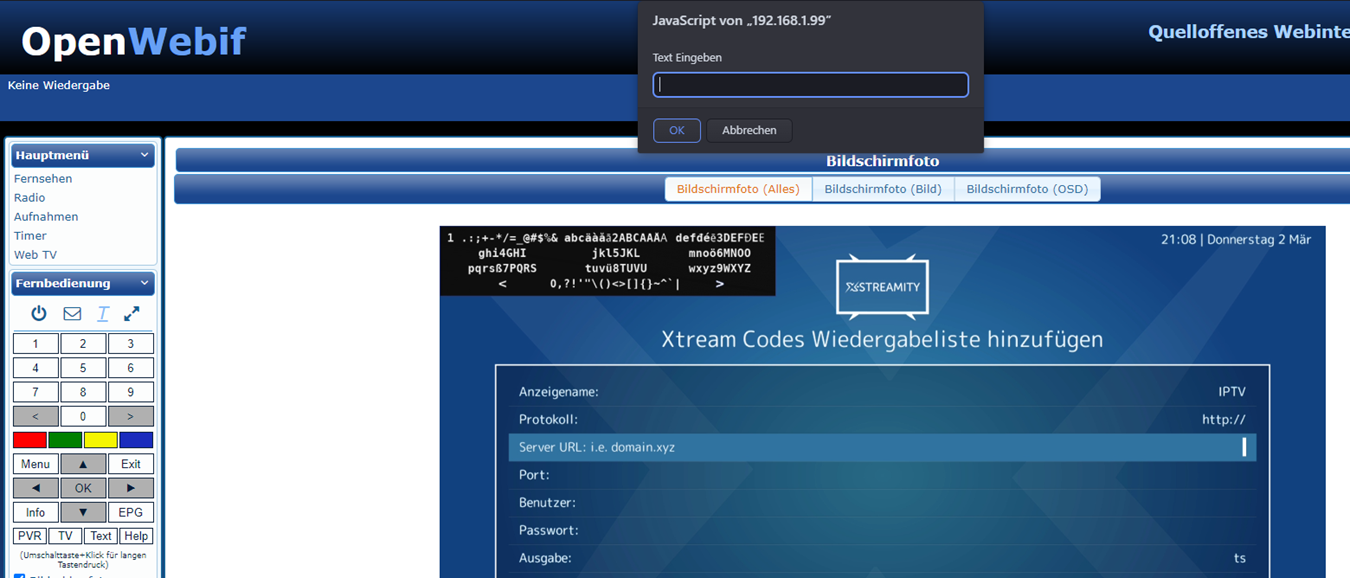
✅ 4. Xstreamity
4.1 Basic Configuration
Menu → Xstreamity → General Settings → easier to fill out using OpenWebif via browser.
4.2 VOD & CatchUp
- 4.2.1 Movies & Series → Video-on-Demand or TV series in the Xstreamity menu.
- 4.2.2 CatchUp → Mediathek → Watch past broadcasts.

